If you want to keep your bolt-action rifle in top-notch condition, knowing how to clean it like a pro is essential. Keeping your firearm clean not only ensures optimal performance but also prolongs its lifespan. In this article, we will guide you through the step-by-step process of cleaning a bolt-action rifle like a pro, covering everything from disassembly to reassembly and all the crucial cleaning techniques in between. So, grab your cleaning kit and get ready to learn how to make your rifle shine like new.

Gathering the Necessary Supplies
Before you start cleaning your bolt-action rifle, it’s important to gather all the necessary supplies. This will ensure that you have everything you need within reach, allowing you to clean your rifle efficiently.
Preparing a Cleaning Kit
First and foremost, you’ll need a cleaning kit specifically designed for firearms. These kits typically include various brushes, patches, cleaning solvents, lubricants, and a cleaning rod. It’s important to invest in a high-quality cleaning kit to ensure the best results for your rifle.
Gathering Cleaning Solvents and Lubricants
Next, you’ll need to gather the appropriate cleaning solvents and lubricants for your rifle. Different firearms may require different solvents and lubricants, so make sure to do your research and select the right ones for your specific rifle. It’s crucial to choose solvents that effectively break down fouling and lubricants that provide adequate protection and smooth operation.
Getting the Right Brushes and Patches
Proper brushes and patches are essential for effectively cleaning the barrel of your bolt-action rifle. Make sure to choose brushes that are designed for your rifle’s caliber to avoid damaging the rifling. Additionally, select high-quality cleaning patches that are lint-free to prevent lint residue from being left behind in the barrel.
Obtaining a Cleaning Rod
A cleaning rod is necessary for running brushes and patches through the barrel of your rifle. It’s recommended to use a two-piece cleaning rod made of a non-abrasive material, such as carbon fiber or stainless steel. Avoid using one-piece cleaning rods, as they can potentially damage the barrel.
Stocking up on Cleaning Cloths and Swabs
Cleaning cloths and swabs are crucial for wiping down and drying various parts of your rifle. Ensure that you have an adequate supply of lint-free cleaning cloths to prevent any unwanted debris from being left behind. Additionally, stock up on cotton swabs to reach small and hard-to-access areas, such as the chamber and receiver.
Preparing the Rifle for Cleaning
Now that you have gathered all the necessary supplies, it’s time to prepare your rifle for cleaning. Follow these steps to ensure a safe and effective cleaning process.
Unloading the Rifle
Safety should always be the top priority when handling firearms. Before starting the cleaning process, ensure that your rifle is unloaded. Remove the magazine and visually inspect the chamber to verify that there are no rounds present.
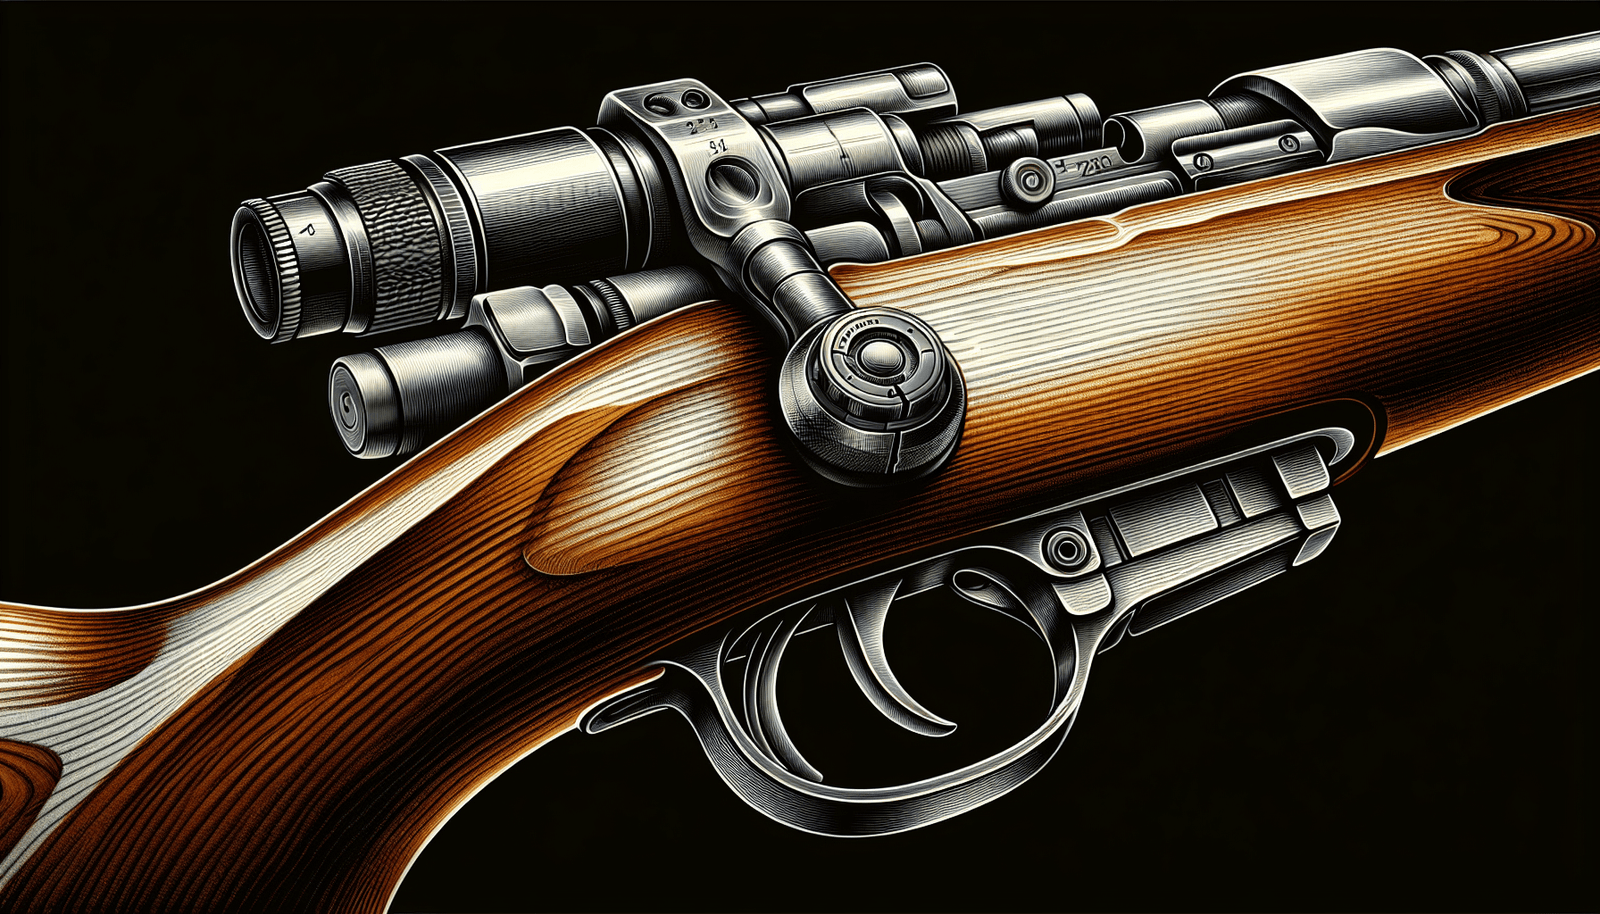
Removing the Bolt Assembly
To properly clean a bolt-action rifle, you’ll need to remove the bolt assembly. Each rifle may have a slightly different method for removing the bolt, so refer to your rifle’s manual for specific instructions. Generally, this involves pulling the bolt back and then pushing a release button or lever to remove it from the receiver.
Verifying the Rifle is Safe to Clean
Once the bolt assembly is removed, verify that the rifle is safe to clean by visually inspecting the chamber and receiver. Ensure that there are no live rounds or obstructions present. It’s also important to engage the safety mechanism if your rifle has one.
Securing the Rifle in a Cleaning Rest
To provide stability and make the cleaning process easier, it’s recommended to secure your rifle in a cleaning rest or vise. This will hold the rifle in place while you work on different components, preventing any accidental damage or mishaps.
Removing the Scope (if applicable)
If your rifle is equipped with a scope, it’s advisable to remove it before cleaning. This will not only make it easier to access various parts of the rifle but also protect the delicate optics from any cleaning solvents or debris.
Cleaning the Barrel
Cleaning the barrel is one of the most important steps in maintaining the accuracy and performance of your bolt-action rifle. Follow these steps to properly clean the barrel.
Applying a Solvent to the Bore Brush
Start by applying an appropriate cleaning solvent to a bore brush that matches the caliber of your rifle. Ensure that the brush is fully saturated with the solvent without dripping excessively. This will help break down any fouling, residue, or carbon buildup inside the barrel.
Running the Bore Brush Through the Barrel
Once the bore brush is saturated with solvent, carefully insert it into the chamber end of the barrel and push it through the entire length of the barrel using a cleaning rod. This should be done in one smooth movement, ensuring that the brush makes contact with the entire inner surface of the barrel.
Removing the Fouling with a Cleaning Patch
After running the bore brush through the barrel several times, it’s time to remove the fouling and solvent. Attach a cleaning patch to the tip of the cleaning rod and carefully insert it into the chamber end of the barrel. Push the patch through the barrel using a smooth and straight motion, ensuring that it makes contact with the entire barrel surface.
Repeating the Process Until the Patch Comes Out Clean
Continue running the bore brush followed by the cleaning patch through the barrel until the patch comes out relatively clean. This indicates that the majority of the fouling and residue has been removed from the barrel.
Dry-Patching and Inspecting the Barrel
After the patch comes out clean, run a few dry patches through the barrel to remove any remaining solvent residue. Once the barrel is dry, inspect it under good lighting to ensure that it is clean and free from any visible debris or fouling.
Removing Stubborn Carbon Buildup (if necessary)
If you encounter stubborn carbon buildup that is not easily removed with the bore brush and patches, you may need to use a carbon removal tool or a specialized carbon solvent. Follow the manufacturer’s instructions carefully to safely and effectively remove the carbon buildup.
Cleaning the Bolt Assembly
The bolt assembly is another crucial component of your bolt-action rifle that requires regular cleaning and lubrication. Follow these steps to properly clean the bolt assembly.
Takedown and Disassembly of the Bolt
Begin by disassembling the bolt assembly according to your rifle’s manual. This usually involves removing the firing pin, bolt handle, extractor, and other small components. Take note of the order in which the components are removed for ease of reassembly.
Removing Firing Pin and Spring
Once the bolt assembly is disassembled, carefully remove the firing pin and its spring. Inspect these components for any dirt, debris, or signs of wear. If necessary, clean them with a solvent-soaked cloth or brush, being careful not to damage any delicate parts.
Cleaning and Lubricating the Bolt Components
Clean all the disassembled bolt components using a suitable cleaning solvent and brushes. Pay close attention to areas where carbon buildup or fouling may accumulate. After cleaning, make sure to thoroughly dry all the components before applying an appropriate lubricant. Apply a thin layer of lubricant to all moving parts to ensure smooth operation.
Inspecting and Cleaning the Trigger Assembly
While you have the bolt assembly disassembled, inspect the trigger assembly for any dirt or debris. Use a suitable solvent and brushes to clean the trigger components, ensuring that no excess solvent or debris remains. After cleaning and drying, apply a small amount of lubricant to the necessary parts of the trigger assembly.
Assembling and Reinstalling the Bolt
Once all the bolt components are clean and properly lubricated, carefully reassemble the bolt in the reverse order of disassembly. Pay attention to the correct orientation and placement of each component to ensure proper functionality. Make sure that all the components fit together smoothly and securely before reinstalling the bolt in the rifle.

Cleaning the Chamber and Receiver
The chamber and receiver are critical areas of your bolt-action rifle that require regular cleaning and maintenance. Follow these steps to properly clean the chamber and receiver.
Wiping Down the Chamber and Receiver with Cleaning Cloths
Start by wiping down the chamber and receiver with lint-free cleaning cloths to remove any loose debris or residue. Pay close attention to hard-to-reach areas such as corners and recesses.
Applying Solvent to the Cleaning Brush
Next, apply an appropriate cleaning solvent to a cleaning brush. Use a brush specifically designed for firearms to effectively clean the chamber and receiver without causing any damage.
Brushing the Chamber and Receiver
Carefully brush the chamber and receiver using the solvent-soaked brush. Pay extra attention to areas where fouling or buildup may occur, such as the feed ramps and locking lugs. Scrub gently but thoroughly to ensure that all debris is removed.
Wiping Down the Area with Swabs
After brushing, use cotton swabs soaked in cleaning solvent to reach smaller and harder-to-access areas. Swabs are particularly useful for cleaning the extractor groove, breech face, and other tight spots where debris may accumulate.
Drying and Inspecting the Chamber and Receiver
Once the cleaning process is complete, thoroughly dry the chamber and receiver with clean, dry cloths. It’s important to ensure that no solvent or moisture remains, as it can cause corrosion or interfere with the proper functioning of your rifle. After drying, inspect the chamber and receiver under good lighting to ensure that they are clean and free from any visible debris or residue.
Cleaning the Stock
The stock of your bolt-action rifle not only provides a comfortable grip but also contributes to the overall aesthetics of the firearm. Here’s how to properly clean and maintain your rifle’s stock.
Removing Dirt and Debris from the Stock
Start by removing any loose dirt, dust, or debris from the stock using a soft brush or cloth. Gently brush or wipe the surface, paying close attention to areas where dirt or grime may accumulate, such as checkering or grooves.
Using a Stock Cleaner for Stubborn Stains
If the stock has stubborn stains or marks that cannot be easily removed with a brush or cloth, you may need to use a specialized stock cleaner or mild soap. Apply the cleaner or soap to a clean cloth or soft brush and gently scrub the stained areas. Avoid using harsh chemicals or abrasive materials that may damage or discolor the stock.
Applying Stock Oil or Wax for Protection
Once the stock is clean and dry, it’s important to protect it from moisture and the elements. Apply a thin layer of stock oil or wax to the entire surface of the stock, using a clean cloth or applicator. This will help preserve the integrity of the wood and provide a protective barrier against moisture and minor scratches.
Buffing and Polishing the Stock (if desired)
If you want to enhance the appearance of the stock, you can buff and polish it to achieve a smooth and glossy finish. This can be done using a soft cloth or polishing compound specifically designed for gun stocks. Gently rub the polish onto the stock using circular motions until the desired shine is achieved. However, be mindful not to apply excessive pressure or polish too vigorously, as this can damage the stock’s finish.
Cleaning and Maintaining the Scope (if applicable)
If your bolt-action rifle is equipped with a scope, it’s important to clean and maintain it regularly to ensure optimal performance and clarity. Here’s how to properly clean and maintain your rifle scope.
Removing the Scope from the Rifle
To clean the scope properly, it’s best to remove it from the rifle. This will provide easier access to the entire scope body and lens surfaces, as well as minimize the risk of damaging the rifle or scope during the cleaning process.
Dusting and Cleaning the Scope Body
Start by dusting off the scope body using a soft brush or a can of compressed air. Carefully remove any loose dirt, debris, or fingerprints that may have accumulated on the scope body. Be gentle to avoid scratching or damaging the scope’s finish.
Cleaning the Lens Surfaces
The lens surfaces are the most critical parts of your rifle scope, as they directly affect your sight picture and clarity. To clean the lens surfaces, use a lens cleaning solution or lens cleaner specifically designed for optics. Apply a small amount of the cleaner to a microfiber cloth or lens cleaning tissue and gently wipe the lens surfaces in a circular motion. Avoid using excessive pressure or abrasive materials that could scratch or damage the lenses. If necessary, repeat the process until the lenses are clean and free from any smudges or marks.
Reinstalling the Scope and Verifying Zeroing
Once the scope has been cleaned and the lenses are dry, reinstall it on your rifle according to the manufacturer’s instructions. Take note of any mounting/zeroing instructions provided by the scope manufacturer to ensure accurate and consistent shooting. After reinstallation, carefully verify the zeroing of your rifle scope to ensure that it has not been affected during the cleaning process.
Applying Lubrication
Proper lubrication is crucial for maintaining the smooth operation and longevity of your bolt-action rifle. Here’s how to apply lubrication to different rifle components.
Choosing the Right Lubricant for Each Rifle Component
Different components of your rifle may require different types of lubricants. It’s important to choose the appropriate lubricant for each component to ensure optimal performance. Consider using a firearms-specific lubricant that is designed to withstand the pressures and temperatures typically encountered during shooting.
Applying a Thin Layer of Lubricant to Moving Parts
After selecting the appropriate lubricant, apply a thin layer to all moving parts of your rifle. This includes the bolt assembly, trigger assembly, sliding surfaces, and any other areas where metal parts come into contact. Avoid applying excessive amounts of lubricant, as it can attract dust and debris, potentially leading to malfunctions.
Removing Excess Lubricant to Prevent Accumulation of Debris
Once you have applied the lubricant, use a clean cloth or cotton swabs to remove any excess. It’s important to ensure that only a thin, even layer of lubricant remains on the components. Excessive lubricant can attract dirt and debris, potentially causing malfunctions or affecting the accuracy of your rifle.
Final Inspection and Reassembly
Before you can consider your bolt-action rifle fully clean, it’s essential to conduct a final inspection and reassemble all the components. Follow these steps to complete the cleaning process.
Inspecting Each Component for Cleanliness
Inspect each cleaned component of your rifle, including the barrel, bolt assembly, chamber, receiver, stock, and scope (if applicable). Ensure that all parts are clean, free from debris, and adequately lubricated. It’s important to carefully examine each component under good lighting to identify any remaining dirt or residue.
Reassembling the Bolt and Bolt Assembly
Once you are satisfied with the cleanliness of each component, reassemble the bolt and bolt assembly. Follow the reverse order of disassembly, referring to your rifle’s manual if necessary. Take your time to correctly align and seat each component to ensure reliable and consistent operation.
Reinstalling the Scope (if applicable)
If you have previously removed the scope, now is the time to reinstall it on your rifle. Follow the manufacturer’s instructions for scope mounting and zeroing procedures. Make sure to carefully tighten all screws and check the alignment of the scope before finalizing its installation.
Verifying Functionality of Rifle
Before considering your cleaning process complete, it’s crucial to verify the functionality of your bolt-action rifle. Assemble the rifle, cycle the bolt, and perform a function check to ensure that everything is in proper working order. Verify that the trigger, safety mechanism, and all other controls are functioning as expected.
Properly Storing the Rifle
After successfully cleaning and verifying the functionality of your bolt-action rifle, it’s important to store it properly to maintain its condition. Keep the rifle in a secure location, such as a gun safe or locked case, to prevent unauthorized access and protect it from dust, moisture, and potential damage.
Additional Maintenance Tips
In addition to regular cleaning, there are a few maintenance tips that can help keep your bolt-action rifle in optimal condition for years to come. Consider implementing the following practices into your firearm care routine:
Regularly Cleaning the Barrel
Cleaning the barrel should be a regular part of your firearm maintenance routine, especially after shooting sessions. Regular cleaning will prevent the buildup of fouling and maintain the accuracy and performance of your rifle. It’s advisable to clean the barrel at least after every shooting session or as recommended by the rifle manufacturer.
Periodically Checking and Cleaning the Stock
Regularly inspect the stock of your bolt-action rifle for any signs of wear, cracks, or damage. Dirt, moisture, and debris can accumulate in the checkering, grooves, and other recessed areas of the stock. Periodically clean these areas using a soft brush or cloth to prevent any buildup that could potentially harm the wood.
Protecting the Rifle From Rust and Corrosion
To prevent rust and corrosion, it’s crucial to protect your bolt-action rifle from moisture and humidity. Apply a thin layer of rust-preventing oil to metal parts to create a protective barrier. Additionally, consider using a dehumidifier or desiccant in your gun safe or storage area to maintain a dry environment.
Keeping the Rifle in a Protective Case or Safe
When not in use, it’s important to store your bolt-action rifle in a protective case or gun safe. This will not only protect it from physical damage but also prevent unauthorized access. Ensure that the storage area is dry, cool, and well-ventilated to maintain the condition of your rifle.
Maintaining the Optics and Scope
If your bolt-action rifle is equipped with optics or a scope, periodically check the mounting screws to ensure they are tight. Clean the optics following the manufacturer’s instructions, taking care to avoid scratching the lens surfaces. Store your rifle in a manner that protects the optics from impact or rough handling.
By following these comprehensive steps and additional maintenance tips, you can clean and maintain your bolt-action rifle like a pro. Regular cleaning and care will not only ensure the longevity and reliability of your firearm but also contribute to optimal performance and accuracy. Remember to always prioritize safety and consult your rifle’s manual for specific cleaning instructions or guidance. Now go ahead and enjoy the satisfaction of owning a clean and well-maintained bolt-action rifle!